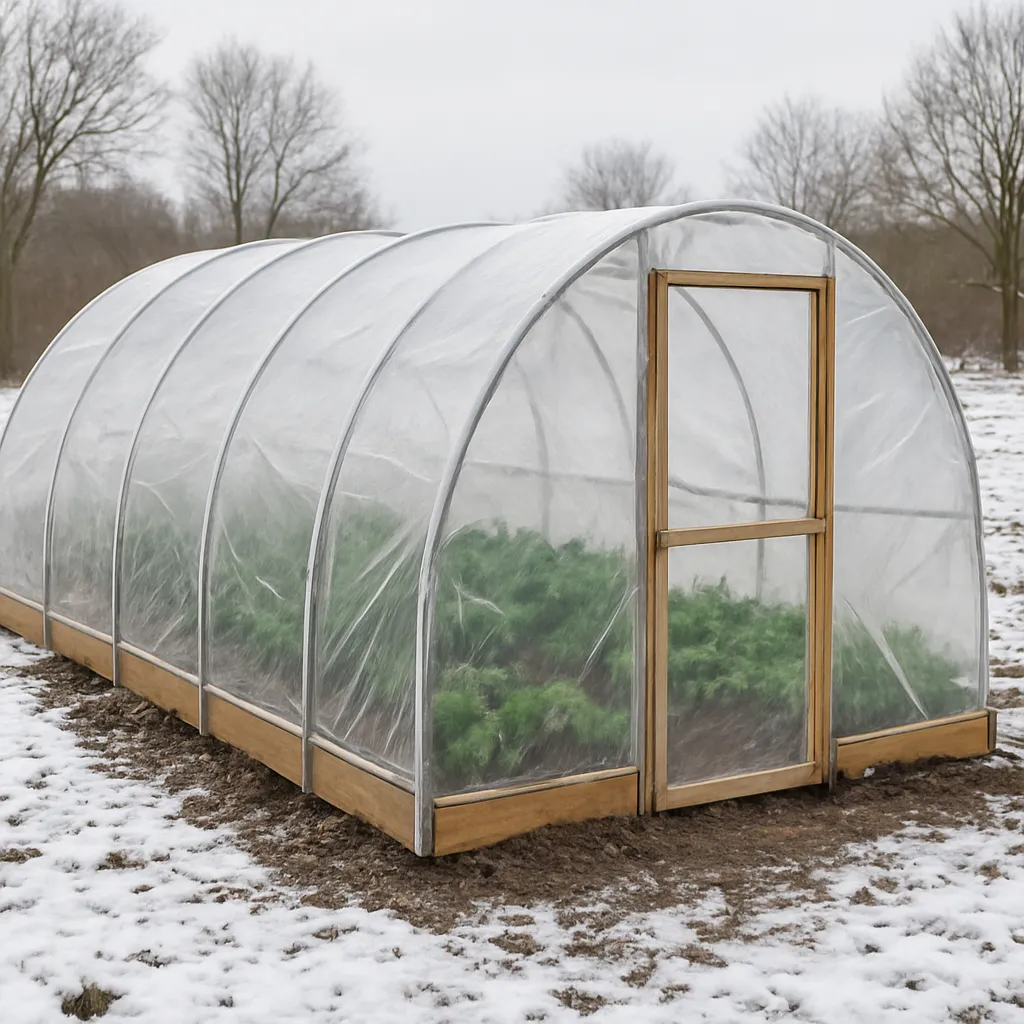
Building a hoop house for winter growing can transform your garden into a year-round source of fresh produce. This simple structure harnesses solar energy, protects plants from frost and wind, and extends the growing season by several months. Whether you’re a hobbyist gardener or a small-scale farmer, mastering the process will boost your yields and reduce reliance on store-bought greens during the coldest months.
Selecting the Right Location and Materials
Choosing an ideal site and quality materials lays the foundation for a durable, efficient hoop house. Key factors include sunlight exposure, soil drainage, and ease of access.
Sunlight and Orientation
- Position the structure along an east-west axis to maximize daily sun penetration.
- Avoid shading from trees or buildings; aim for a minimum of six hours of direct winter sun.
Soil and Drainage
- Ensure the ground slopes slightly away to prevent water pooling.
- Amend existing soil with compost and organic matter to improve fertility and structure.
Essential Materials
- Hoops: Galvanized steel or PVC pipes offer sturdiness and flexibility.
- Covering: 6-mil UV-resistant greenhouse plastic is standard for light transmission and durability.
- Anchors: Ground stakes, rebar, or sandbags keep the structure secure in wind and snow.
- End Walls: Lumber or lightweight plastic boards can frame doors and vents.
Designing Your Hoop House
Careful planning prevents costly mistakes and ensures a structure that meets your needs. Consider size, airflow and features before breaking ground.
Size and Scale
- A typical backyard hoop house ranges from 8 to 12 feet in width and 20 to 30 feet in length.
- Keep pathways at least 18 inches wide to facilitate planting, weeding, and harvesting.
Ventilation and Access
Proper airflow controls temperature and humidity, reducing disease risk.
- Install roll-up sides or roof vents to allow hot air to escape on sunny days.
- Include a simple hinged or sliding door for easy entry.
Irrigation and Drainage
Consistent moisture levels are critical for healthy growth during winter’s dry spells.
- Drip irrigation lines deliver water directly to the roots, minimizing evaporation.
- Gravel beds beneath planting rows improve drainage and prevent waterlogging.
Step-by-Step Construction Process
Follow these guidelines to assemble your hoop house safely and effectively.
1. Preparing the Site
- Clear vegetation and level the ground.
- Mark the perimeter with stakes and string.
- Optional: Lay down landscape fabric to suppress weeds.
2. Setting the Hoops
- Drive ground stakes every 4 feet along each side.
- Slide PVC or steel hoops over the stakes, bending into arches.
- Secure each hoop at the base using brackets or wire ties.
3. Framing the Ends
- Construct end walls with pressure-treated lumber for longevity.
- Frame door openings and attach hinges or sliding hardware.
- Install vents above the end walls for cross-ventilation.
4. Attaching the Cover
- Unroll the greenhouse plastic carefully to avoid punctures.
- Pull the film taut over the hoops and staple or clip along the sides.
- Use wiggle wire or batten strips to secure the edges in channels.
- Seal any gaps with silicone caulk or weatherstripping.
5. Reinforcing for Winter Conditions
- Add purlins—horizontal braces between hoops—to bolster the framework against snow load.
- Place sandbags or earth berms along the base to insulate and stabilize.
- Consider a secondary clear plastic liner for extra heat retention.
Maintaining Optimal Conditions
Once built, consistent monitoring and adjustments will keep plants thriving in subfreezing weather.
Temperature Regulation
- Open vents during the day when temperatures exceed 50°F to prevent overheating.
- Close vents at dusk to trap warmth and protect against frost.
- Use thermal mass—barrels of water or stone—to absorb heat by day and release it at night.
Humidity Control
- Avoid excessive moisture by ensuring proper air circulation.
- Water early in the day so leaves dry before evening, reducing disease pressure.
Pest and Disease Management
Healthy hoop houses are not immune to challenges. Vigilance and integrated strategies are key.
- Inspect plants weekly for signs of fungal infection or insect damage.
- Use floating row covers or sticky traps to control insects.
- Rotate crops annually to break disease cycles and maintain soil fertility.
Extending the Season and Maximizing Yields
With your hoop house established, plan for a continuous rotation of winter crops and experiment with advanced techniques.
Warm-Season Cover Crops
- Sow nitrogen-fixing seeds such as clover or vetch in early winter to enrich soil for spring.
- Turn cover crops under before they set seed to add organic matter.
Succession Planting
- Establish quick-maturing greens like radishes and mustard in late fall.
- Follow with hardy lettuces, kale, and spinach in mid-winter.
- Finish with early spring onions and brassicas before harvest.
Advanced Techniques
- Incorporate row cover textiles for subzero nights.
- Install supplemental LED lighting to boost photosynthesis on overcast days.
- Implement hydroponic or aquaponic systems under the shelter for increased yield per square foot.