Implementing a composting toilet on your farm brings together sustainability, nutrient recovery, and much-needed water conservation. By diverting human waste into a managed composting system, you can reduce reliance on septic or sewer connections while generating nutrient-rich compost for non-food plants. This guide will walk you through the principles, design choices, construction steps, and maintenance tips necessary to build an efficient farm-scale composting toilet.
Understanding the Principles of Composting Toilets
How Composting Works
Composting relies on aerobic decomposition carried out by a diverse community of microorganisms—bacteria, fungi, and invertebrates. In a composting toilet, carbon-rich bulking agents (sawdust, wood chips, or straw) are layered with nitrogen-rich waste to maintain a balanced carbon-to-nitrogen ratio, typically around 25–30:1. Proper balance stimulates microbial activity, generating heat that sanitizes pathogens and accelerates breakdown.
Key Benefits of a Farm-Scale System
- Water Conservation: Composting toilets require no flushing, saving thousands of liters per year.
- Pathogen Reduction: Sustained temperatures above 55 °C can eliminate harmful bacteria.
- Resource Recovery: Humanure transforms into reusable compost that enriches soil structure and fertility.
- Reduced Infrastructure Costs: No septic tanks or complex plumbing systems are needed.
Designing Your Farm Composting Toilet
Choosing the Right Location
Select a site with convenient farm access, stable ground, and good drainage. Ensure the building is downwind from living areas to prevent lingering odors. Consider proximity to water sources—keeping at least 30 meters away from wells or streams to protect water quality.
Materials and Tools Needed
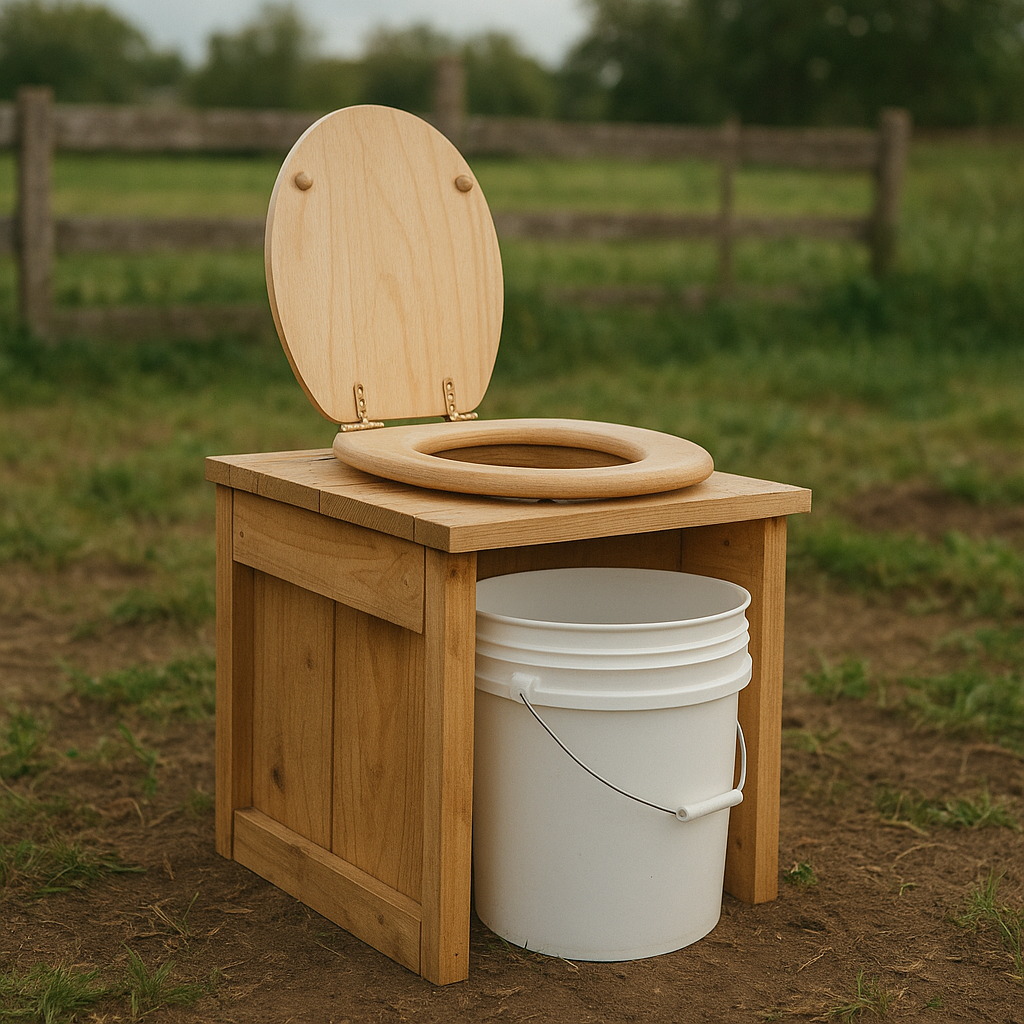
For a durable, weather-resistant structure, gather:
- Pressure-treated lumber or weatherproof panels for framing
- Plywood or composite boards for walls and flooring
- Heavy-duty plastic bins or barrels for compost chambers
- Ventilation pipe (PVC or metal) with a fan or solar-powered extractor
- Hardware: screws, hinges, latches, and gasketing
- Collection bin liners (optional)
- Tools: saw, drill, level, tape measure, caulking gun
Construction Steps
Building the Base and Structure
Start by constructing a robust platform capable of supporting the toilet frame and composting unit. Use level blocks or concrete piers for stable support. Frame the walls and roof with treated studs, ensuring the structure resists moisture and insects. Install a sloped roof to facilitate rain runoff.
Installing Ventilation and Components
Efficient ventilation is crucial to control odors and maintain aerobic conditions. Mount a vent pipe from the composting chamber up through the roof. Attach a solar-powered or low-wattage fan at the top to draw air upward, preventing odor escape into the cabin space. Seal all joints with weatherproof caulking to avoid leaks.
Assembling the Composting Chamber
Position a two-chamber system side by side, allowing one chamber to rest and mature while the other collects fresh material. Fit each chamber with removable bins or rotating drums for ease of access. Ensure each chamber has perforations near the base to facilitate airflow. Line the bottom with a layer of coarse material (wood chips or straw) to enhance drainage and aeration.
Operation and Maintenance
Daily Use and Additives
After each use, add a scoop of dry carbon-rich bulking agent—sawdust, coconut coir, or shredded paper. This promotes moisture control and absorbs liquid. Keep a handy container next to the toilet seat filled with your chosen additive. Place a tight-fitting lid on the collection bin to minimize odors and insect attraction.
Managing Temperature and Moisture
Monitor chamber temperature with a compost thermometer. Aim for 40–60 °C to foster pathogen kill-off and rapid decomposition. If temperature drops below 40 °C, consider insulating the chamber or moving material to a warmer location. For moisture management, maintain a damp sponge consistency—too dry slows microbes, too wet fosters odors and anaerobic pockets.
Harvesting the Compost
Allow filled chambers to rest for at least six months to a year. During this maturation phase, the compost stabilizes and loses any harmful pathogens. Test for readiness: mature compost is dark, crumbly, and smells of forest humus. Transfer finished compost to designated non-edible plant beds or orchard areas to supply essential organic matter.
Troubleshooting Common Issues
Odor and Pest Control
Unpleasant odors typically indicate anaerobic zones or excess moisture. Add more dry bulking agent and ensure adequate aeration. Inspect seals around lids and vents to stop flies or rodents. Use fine meshed screens on vent openings and add predator-friendly perches if wildlife becomes attracted.
Moisture Imbalances
Excess leachate at the bottom signals over-saturation. Improve drainage by adding more coarse materials and drilling extra drain holes. If the system dries out, mist the pile lightly with water—avoid soaking. Adjust leaf-to-excrement ratios until the compost retains a gentle humidity.